Getting started with Vyking Studio
Get started with the basics of Vyking Studio!
Discover everything you need to know about getting started with Vyking Studio from finding your way around the interface, to preparing your first 3D shoe assets. By getting to grips with Vyking Studio, you will be able to prepare and deploy 1000s of SKUs quickly and easily for both iOS and Android platforms.
Important considerations
-
Vyking Studio works in meters as its unit of measurement. Thus if an imported model's length is not in the region of around 0.1 to 1 units then the model will appear too big in the viewer. Although, you do still have the ability to increase/decrease the model's scale.
-
Please be aware that in this version of Vyking Studio the occluders are always children of the 3D shoe model.
Logging in
Please go to: Vyking Studio
If you are already a client of Vyking, you should have received an email with a login and a password. If you have trouble logging in, please contact your Account Manager at Vyking. If you are not a client yet, please send us an email at sales@vyking.io and we’ll get you set up soon.
Navigating the Vyking Studio interface

Vyking studio can is composed of the following sections:
1. Top menu
The left top menu allows you to toggle between:
-
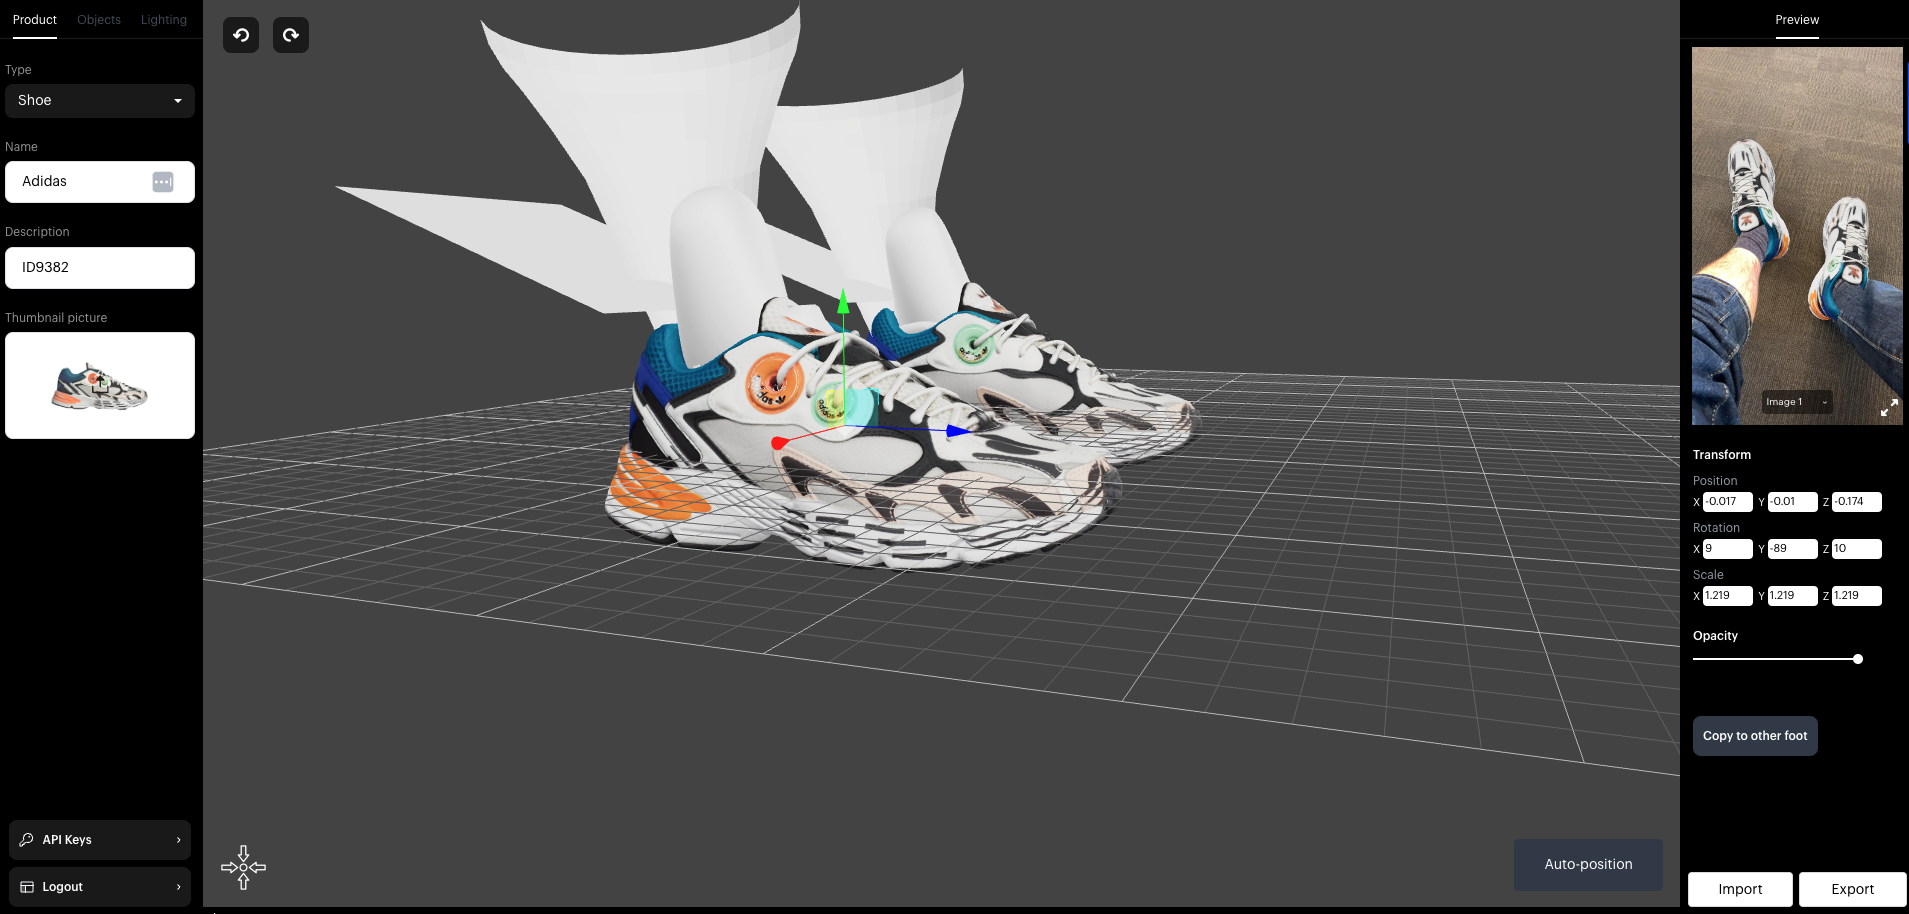
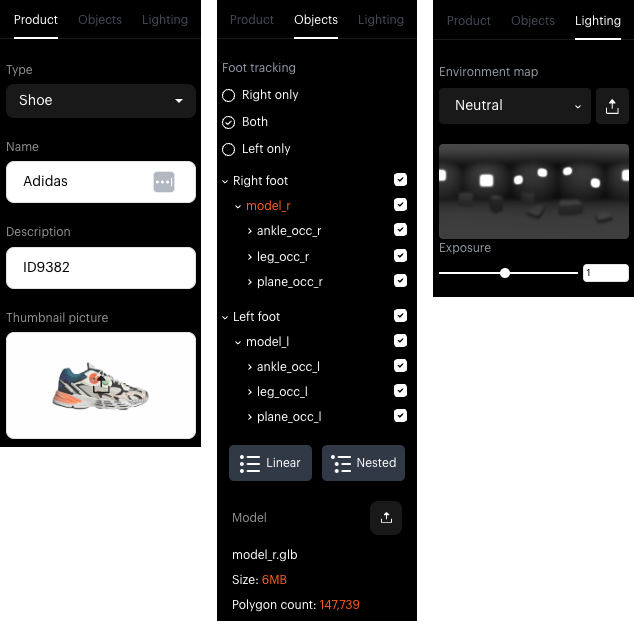
Product: here you can add your product type, description and thumbnail picture for your 3D object.
-
Objects: In the objects section you will be able to choose which foot and occluder to visualize on the 3D view as well as uploading the 3D product and/or occluder of your choice.
-
Lighting: In the lighting section, you can select an environment map to make sure your 3D model is lit in a photo-realistic way. Note that you can also upload your own HDRI in jpg format. You can also adjust the exposure.
2. 3D view
The 3D view will allow you to visualize your 3D model on Vyking’s 3D mesh (foot or hand). It will also allow you to visualize the positioning of each occluder on your 3D object.
3. Preview
The preview section contains a set of pre-recorded videos that allows you to visualize how your 3D shoe looks in a real life-like in app situation.
4. Transform
In the transform section you will be able to change the position, rotation and scale of your 3D shoe and occluders. You can also alter the opacity of each 3D model to make your asset preparation easier.
5. Logger
The Logger section will register each action and allow you to spot any errors you might encounter.
6. Auto-positioning
On the bottom right of the 3D view you will be able to auto-position any 3D model using Vyking's auto-positioning API. To activate it you will need to add API key on the left of the 3D view. Please get in touch with our sales team for access to this feature.
7. Import & Export
In the top menu section, you will be able to export your iOS and Android 3D packages , Import Android 3D packages (in a zip format).